
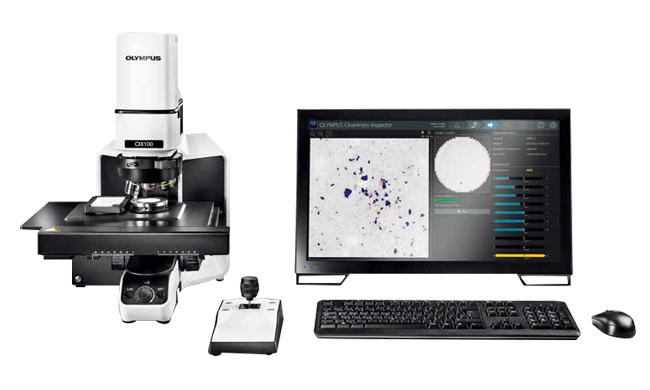
The cleanliness of components and parts is at the center of the manufacturing process. Meeting high standards for counting, analyzing, and classifying the often micron-sized contaminant and foreign particles is important for all processes: development, manufacturing, production, and quality control of the final product. International and national directives describe the methods and documentation requirements for determining particle contamination on essential machined parts since these particles directly impact the lifespan of parts and components. Previously, the mass of residue particles was used to characterize the residue. The standards in use today demand more detailed information about the nature of the contamination such as the number of particles, particle size distribution, and particle characteristic. The OLYMPUS CIX100 Cleanliness Inspection System is designed to meet the cleanliness requirements of modern industry and national and international directives.

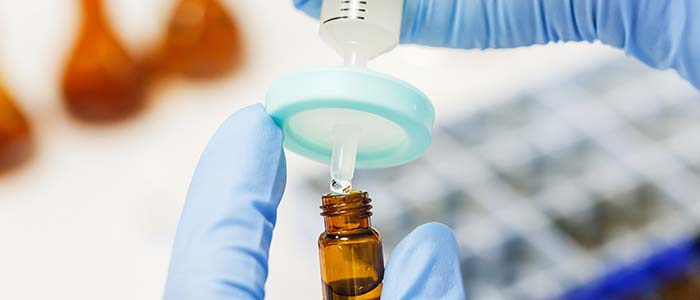
The technical cleanliness of components and parts is essential, especially in the automotive and aerospace industries.
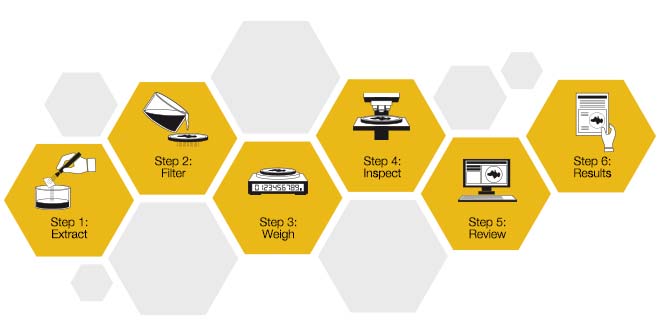
Standard Process for Cleanliness Inspection: Preparation and Investigation
(01:Extraction, 02:Filtration, 03:Weighing, 04:Inspection, 05:Review, 06:Results)
Seamlessly integrated hardware and software result in a durable, high-throughput system that delivers reliable and accurate data.
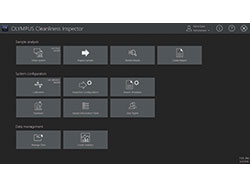
Dedicated, easy-to-use workflows minimize user action and provide reliable data ? independent of the operator and experience level.
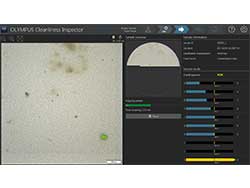
The unique all-in-one-scan solution enables scans to be completed twice as fast as classical method(Inspector series). Counted and sorted particles are displayed live while powerful, easy-to-use tools make it easy to revise inspection data.
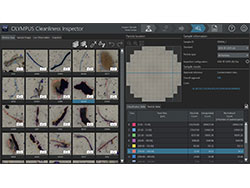
Powerful and easy-to-use tools support to revise inspection data. High flexibility is provided by support of all international standards. Clear representation of all relevant inspection results in a maximum time saving.
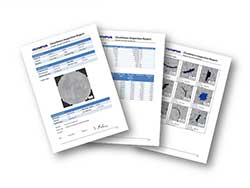
One-click reporting meets the requirements and methodologies set forth in international standards.
Hardware
| Microscope | OLYMPUS CIX100 | Motorized focus | Coaxial motorized fine focus with 3 axis joystick Focus stroke 25mm Fine stroke 100 µm / rotation Maximum height of stage holder mounting : 40 mm Focus speed 200 µm/sec Software autofocus enabled Customizable multi-point focus map |
|---|---|---|---|
| Illumination | Built-in LED illuminationInnovative illumination mechanism with simultaneous detection of reflecting and non-reflecting particlesLight intensity controllable by software | ||
| Imaging device | Color CMOS USB 3.0 cameraOn chip pixel size 2.2 x 2.2 µm | ||
| Sample height | Sample is limited to filter membrane (diameter 42 mm) mounted into the provided filter holder. | ||
| Nose piece | Motorized type | Motorized Nosepiece | 6 positions motorized nosepiece with 3 UIS2 objectives already installedPLAPON 1.25X used for previewMPLFLN 5X used for detecting particles bigger than 10 µmMPLFLN 10X used for detecting particles bigger than 2.5 µm |
| Software controlled | The image magnification and relation between pixel and size is known at every moment.Selected objectives are used at selected steps into the measurement process, objectives are automatically positioned | ||
| Stage | Motorized stage X,Y | Motorized stage X,Y | Stepper motors controlled movementMaximum range : 130 x 79 mmMax speed 240 mm/s (4 mm ball screw pitch)Repeatability < 1µmResolution 0.01 µmControllable with 3 axis joystick |
| Software controlled | Scanning speed is depending on the used magnification, at 10x the scanning speed is less than 10 minutesStage alignment is performed at factory assembly | ||
| Specimen holder | Sample holder | Membrane holder is specially designed to avoid an unwanted rotation of the membrane during the mountingThe membrane is mechanically flatten by the membrane holderNo tool is needed to fix the coverThe sample holder is always assigned the slot 1 on the stage | |
| Particle Standard Device (PSD) | Reference sample used to validate the system measurementSample used in the check system built-in function for controlling the proper function of the CIXThe PSD is always assigned slot 2 on the stage | ||
| Stage insert | 2-Position stage insert | Stage insert dedicated to the right positioning of the sample holder and the PSD | |
| Controller | Workstation | High-Performance pre-installed workstation | HP Z440, Windows 10-64 bit Professional (English)16 GB RAM, 256 GB SSD and 4 TB data storage2GB video adapterMicrosoft Office 2016 (English) installedNetworking capabilities, English qwerty keyboard, optical mouse 1000 dpi |
| Add-in boards | Motorized controller, RS232 serial and USB 3.0 | ||
| Language selection | Operating system and Microsoft Office default language can be changed by the user | ||
| Touch panel display | 23 inch slim screen | Resolution 1920x1080 optimized for use with the CIX software | |
| Power | Rating | AC adapter (2), Controller and Microscope frame (4 plugs necessary)Input: 100-240V AC 50/60Hz, 10 A | |
| Power consumption | Controller: 700 W; Monitor: 56 W; Microscope: 5.8 W; Control Box 7.4 WTotal: 769.2 W | ||
| Drawing | Dimensions (W × D × H) | Approx. 1300 mm × 800 mm × 510 mm | |
| Weight | 44 kg | ||
System environment limitations
| Normal use | Temperature | 10 - 35° C |
|---|---|---|
| Humidity | 30 - 80 % | |
| For safety regulations | Environment | Indoor use |
| Temperature | 5 - 35 °C | |
| Humidity | - Maximum 80% (up to 31 °C) (no condensation) - Usable humidity declines linearly as temperature rises above 31°C - 34°C (70%) to 37°C (60%) to 40°C (50%) |
|
| Altitude | Up to 2000 m | |
| Level of horizon | Up to ±2° | |
| Power supply and voltage stability | ±10% | |
| Pollution level (IEC60664) | 2 | |
| Overall voltage category (IEC60664) | II |
Software
| Software | CIX-ASW-V1.3 | Dedicated workflow software for Technical Cleanliness Inspection |
|---|---|---|
| Languages | GUI | GUI: English, French, German, Spanish, Japanese, Simplified Chinese and Korean |
| Online help | Online help: English, French, German, Spanish, Japanese, Simplified Chinese and Korean | |
| License management | Software | |
| User Management | System | |
| Live image | Display in color mode | Particles are displayed with blue color for metallic ones and black color for non-metallic ones. |
| Window fit method | The image is always displayed in a full view | |
| Live detection | Particles are detected as soon as they are captured for improved speed User can stop the process if the measurement result is not good. | |
| Image capture and manual measurements | Collecting user snapshots | In the review mode it is possible to acquire single images from any position on the sample. It is possible to acquire images in the live observation mode (from direct image) or in the sample view mode (from already recorded data).Images can be stored in .tif, .jpg or .png files with a standard resolution of 1000x1000 pixelsSnapshots can be linked to an already detected particle and used in the analytical report afterwards |
| Manual measurements | It is possible to perform arbitrary distance measurements on an acquired snapshotArbitrary measurements can be renamed and the color can be selectedArbitrary measurements are burned in the image when stored | |
| Hardware control | XY motorized stage | Joystick operation and control by softwareAutomatic or manual repositioning on selected particles |
| Motorized nosepiece | Selection by software only | |
| Motorized focusing | Control by joystickSoftware autofocus availablePredictive autofocus using multipoint focus map | |
| Check system | System verification | System is verified by measuring the Particle Standard Device parameters.OK or NOK quality value is produced |
| Selectable objective | Check system can be performed only with the working objective (one objective should be selected at least)1.25x and 20x are not available for check system | |
| Technical cleanliness standards | Supported standards | ISO 4406:1999; ISO 4407:2002 [Cumulative and Differential]; ISO 11218:1993; ISO 12345:2013; ISO 14952:2003; ISO 16232-10:2007 (A, N, and V); ISO 21018:2008; DIN 51455:2015 [70 and 85%]; NAS 1638:1964; NF E 48-651:1986; NF E 48-655:1989; SAE AS4059:2011; VDA 19.1:2015 (A, N, and V) |
| Precisely compliant to VDA19:2016 recommendations | Thresholds are automatically set at the VDA recommend values | |
| Identification of particle family | Particles can be classified by particle families (fibers, reflecting, reflecting fibers, or others) | |
| Customized standards | User defined standards can be defined easilyParticle measurement parameters include filiform particle size and compact particle size according to DT 55-83 | |
| Inspection configuration | The system allows to load, define, copy, rename, delete and save an inspection configurationStandards and report templates can also be stored and recalledIt is possible to invert the detection threshold in order to detect bright particles on dark background | |
| Particle tile view | Displays the detected particles in tile for improved navigation | Every particle position can be retrieved by double click on the tileEvery tile is adapted to the actual particle size |
| Store the full membrane | The complete filter is stored | Offline analysis allow to select a different standard for the results display |
| Data export | Save data | Inspection data can be exported to an Excel (.xlsx) tableAll tables available in the software can also be exported into Excel. |
| Trend analysis | Trend analysis over several samples (Built-in SQC tool) | Data per size classes can be displayedData can be plotted over time, sample, measurement IDScale can be selected (log-normal, log-log)Data points can be extracted and exported to spreadsheetTable can be exported in Q-DAS (.dfq) format- All tables available in the software can also be exported into Excel. |
| Particle Edition | Particles can be edited during the revision process. | It is possible to:Delete, Merge, Add ParticleChange the particle type |
| Dynamic reports | Professional analytical reports can be produced by using Microsoft Word 2016 | Templates are precisely customizableUsers can select to have the pictures after the table or all pictures grouped together when selecting different particle families |
Optional Solution CIX-S-HM
| eight Measurements | Automatic or Manual height measurement of selected particles | Optional software solution that drives the motorized focus drive from top to bottom of selected particles. The particle height is then processed from the difference between the top and the bottom Z coordinate.Includes an additional objective lens (20x MPLFLN) and a license card that needs to be activated at installation.It is possible to multiple select particles for automatic height measurement on several positions. |
|---|
Environment Law and Regulations
| Europe | Low Voltage Directive 2014/35/EU |
|---|---|
| EMC Directive 2014/30/EU | |
| RoHS Directive 2011/65/EU | |
| REACH Regulation No. 1907/2006 | |
| Packaging and Packaging Waste Directive 94/62/EC | |
| WEEE Directive 2012/19/EU | |
| Machinery Directive 2006/42/EC | |
| USA | UL 61010-1:2010 Edition 3 |
| FCC | |
| Canada | CAN/CSA-C22.2 (No. 61010-1-12) |
| Australia | Radio communications Act 1992, Telecommunications Act 1997 |
| Regulation | |
| Japan | Electrical Appliances and Material Safety Act (PSE) |
| Korea | Electrical Appliances Safety Control Act |
| Regulation on Energy Efficiency Labeling and Standards | |
| Regulations for EMC and Wireless Telecommunication (Notice 2913-5) | |
| China | China RoHS |
| China | |
| Regulation |
If you have question you can reach us. Just fill up the form below.